

Ludo in your terminal
Every Ludo generator from the command line: sprites and animations, images, 3D models, video, sound effects, music and voices. For you, and the recommended way to give coding agents like Claude Code access to Ludo.
npm install -g @ludoai/cli
ludo login
Or run it without installing: npx @ludoai/cli
Included with the Pro and Studio plans. See what a generation costs
Log in with your browser
ludo login shows a short code and opens Ludo in your browser. Check that the code matches and click Authorize. No account yet? You can create one on the same page.
The CLI gets its own key, listed under API Keys in the web app, where you can revoke it; ludo logout revokes it too. Your existing API key and MCP setup keep working. On a CI runner or a machine without a browser, set LUDO_API_KEY or use ludo login --with-key.
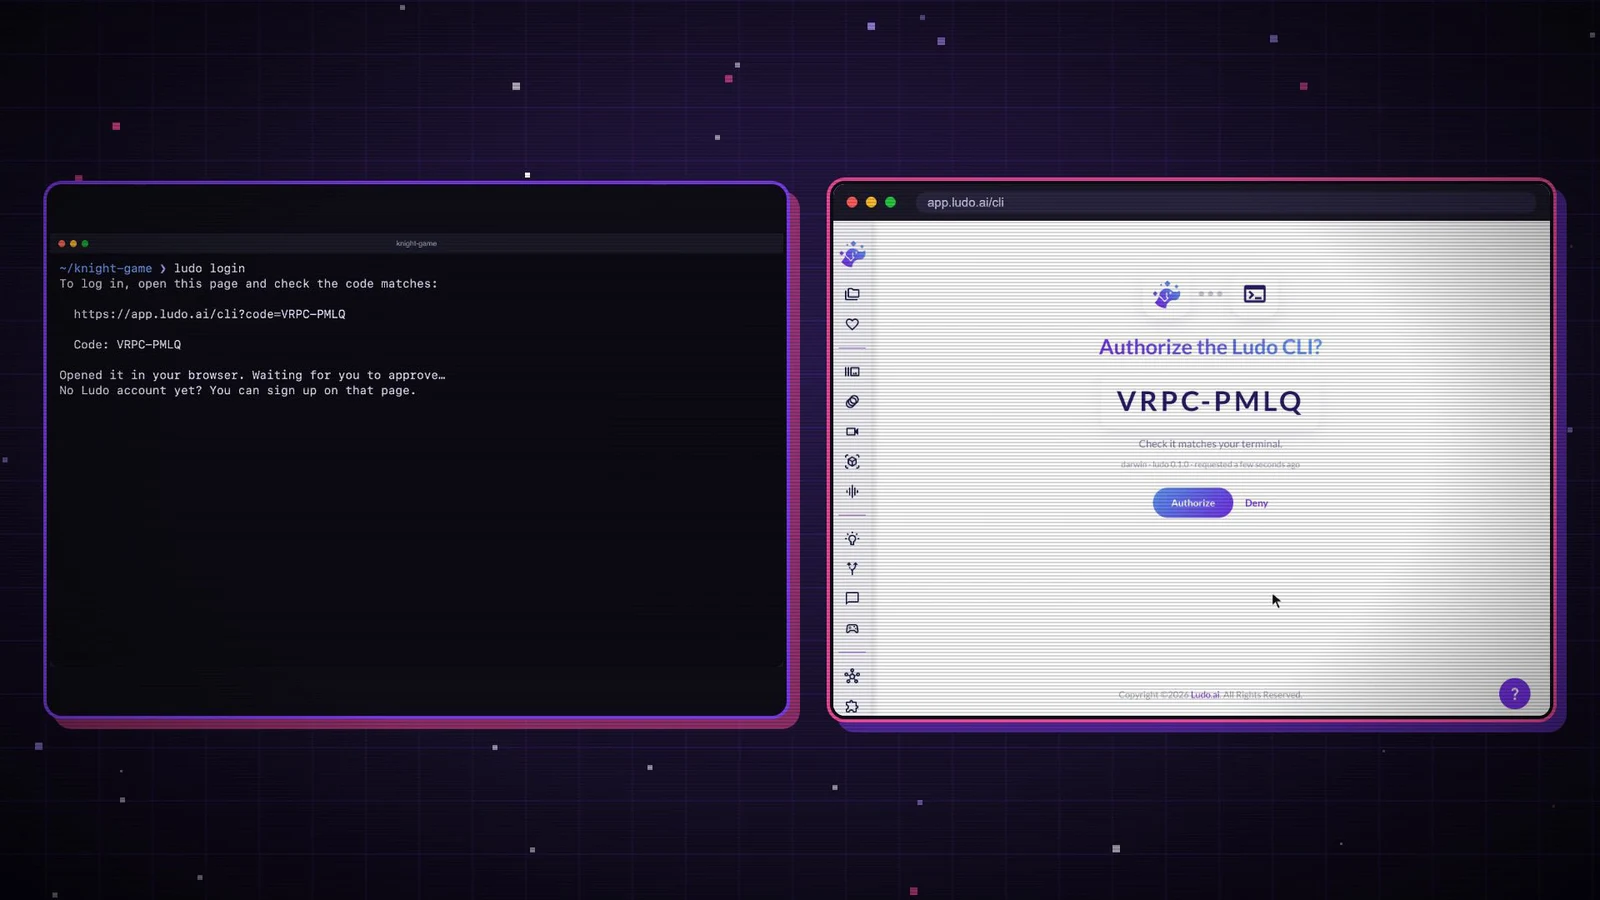
Results on disk, and right in your terminal
The CLI waits for each job and saves every result to ./ludo-output (or wherever --out points). Files stay on your disk after the result links expire, and WebP results get a PNG copy too.
In iTerm2, Kitty, Ghostty and WezTerm the result shows up right under your command. Elsewhere, and inside tmux, the preview is skipped and --open shows the result instead. Each result also says what it cost, how many credits you have left and a good next step.
ludo image create --image-type sprite --art-style Chibi --prompt "a tiny knight with an oversized helmet and a wooden sword"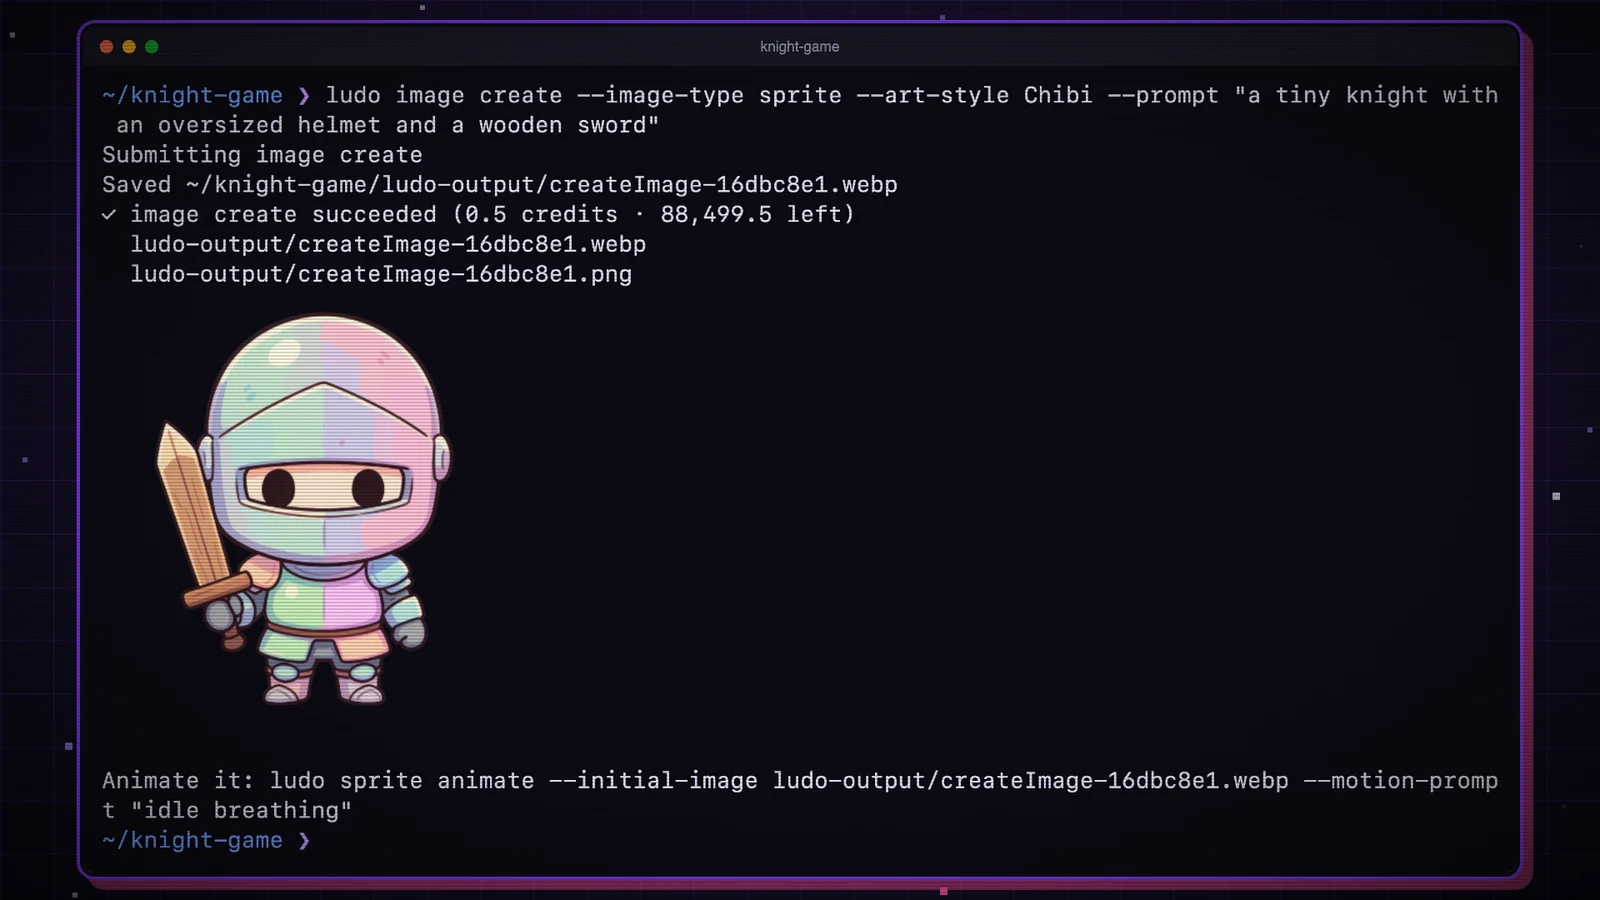
Spritesheets play in place
Animate a sprite and the spritesheet plays as a loop in the terminal; ludo preview <file> plays it again later. Making a Godot game? --engine godot also writes a Godot 4 SpriteFrames resource, ready for an AnimatedSprite2D.
(The CLI names files after the job; we renamed our sprite to knight.webp.)
ludo sprite animate --initial-image ludo-output/knight.webp --motion-prompt "walk cycle" --engine godotLocal files just work
Pass a path to any image, audio, video or model flag and the CLI uploads it: no hosting, no base64. That makes the tools easy to chain: a sprite, then its animation, then a 3D model with ludo model create, rigged with ludo model rig, and a sound with ludo audio sound-effect. --open opens a result, --play plays generated audio and --copy copies the saved paths.
ludo model create --image ludo-output/knight.webp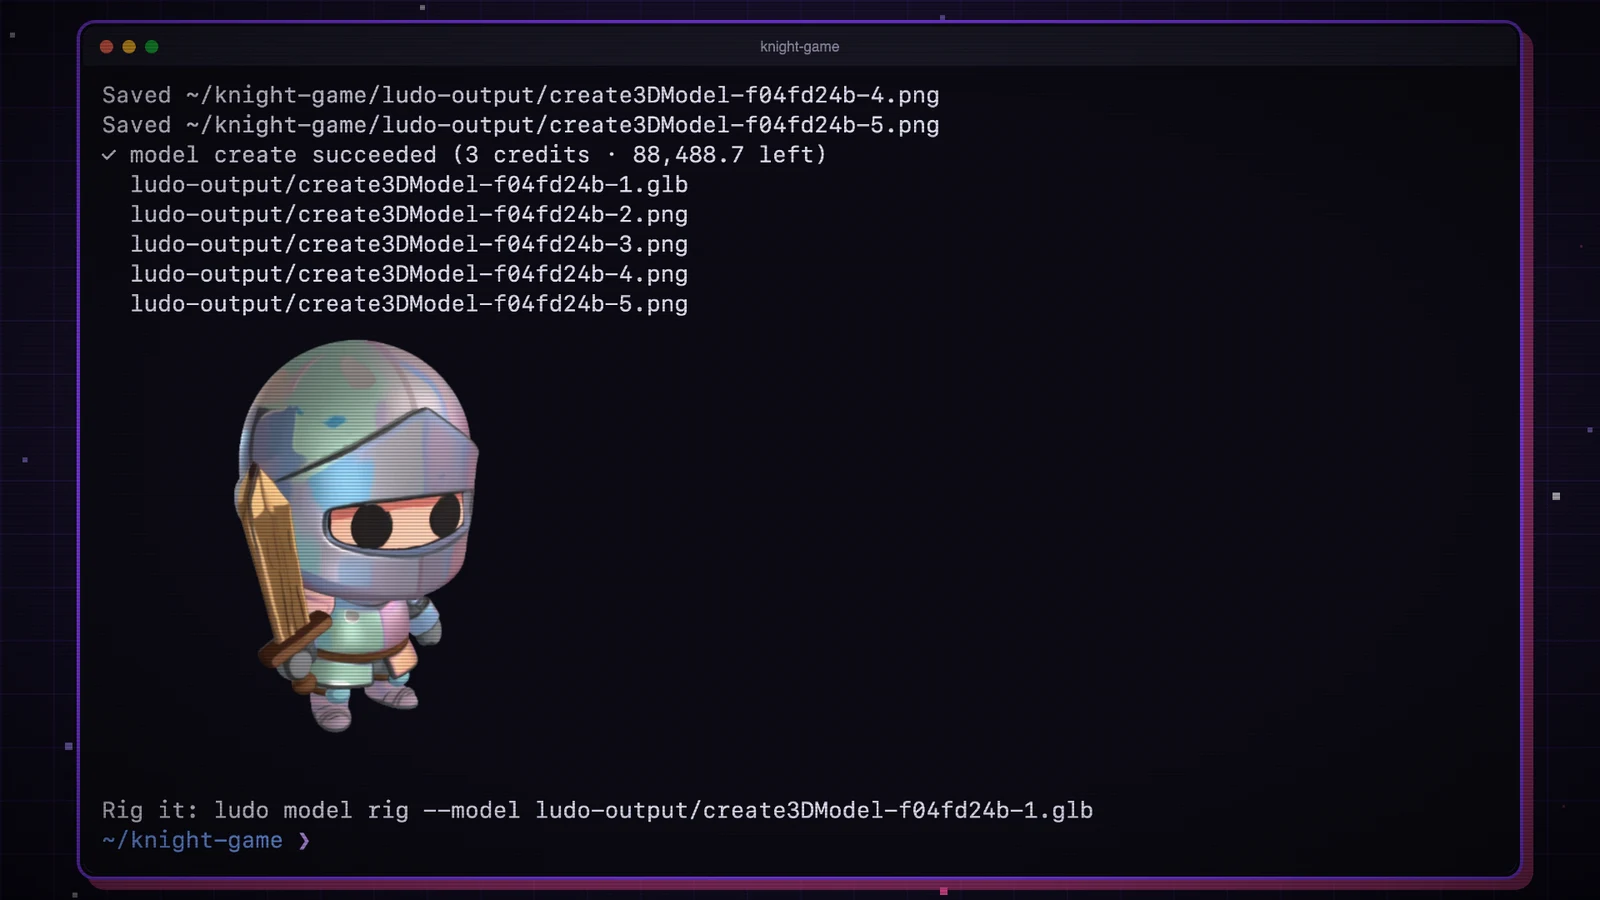
Projects and the asset log
ludo init sets a folder up as a Ludo project: a .ludo.json with the output folder, your game engine, a style image and default settings per command. Every generated file is recorded in ludo-assets.json with the command that made it. ludo assets lists them, and ludo assets redo remakes one with changes.
ludo init
ludo assets redo ludo-output/knight.webp --prompt "...in blue"
Variations and batches
--n 4 makes four variations of the same request, and at a terminal you pick the ones to keep. ludo batch runs a list of different generations side by side; a failed item does not stop the others. A batch or a set of variations that would spend more than 50 credits asks you to confirm first.
ludo batch jobs.jsonStay in control of credits
--dry-run shows what a command would cost without running it, and --max-credits refuses one that would cost more than you set. Give a project or a machine a spending budget (max_credits in .ludo.json, or LUDO_MAX_CREDITS) and ludo spend shows the tally. There is no limit unless you set one.
ludo model create --image ludo-output/knight.webp --dry-runMade for coding agents
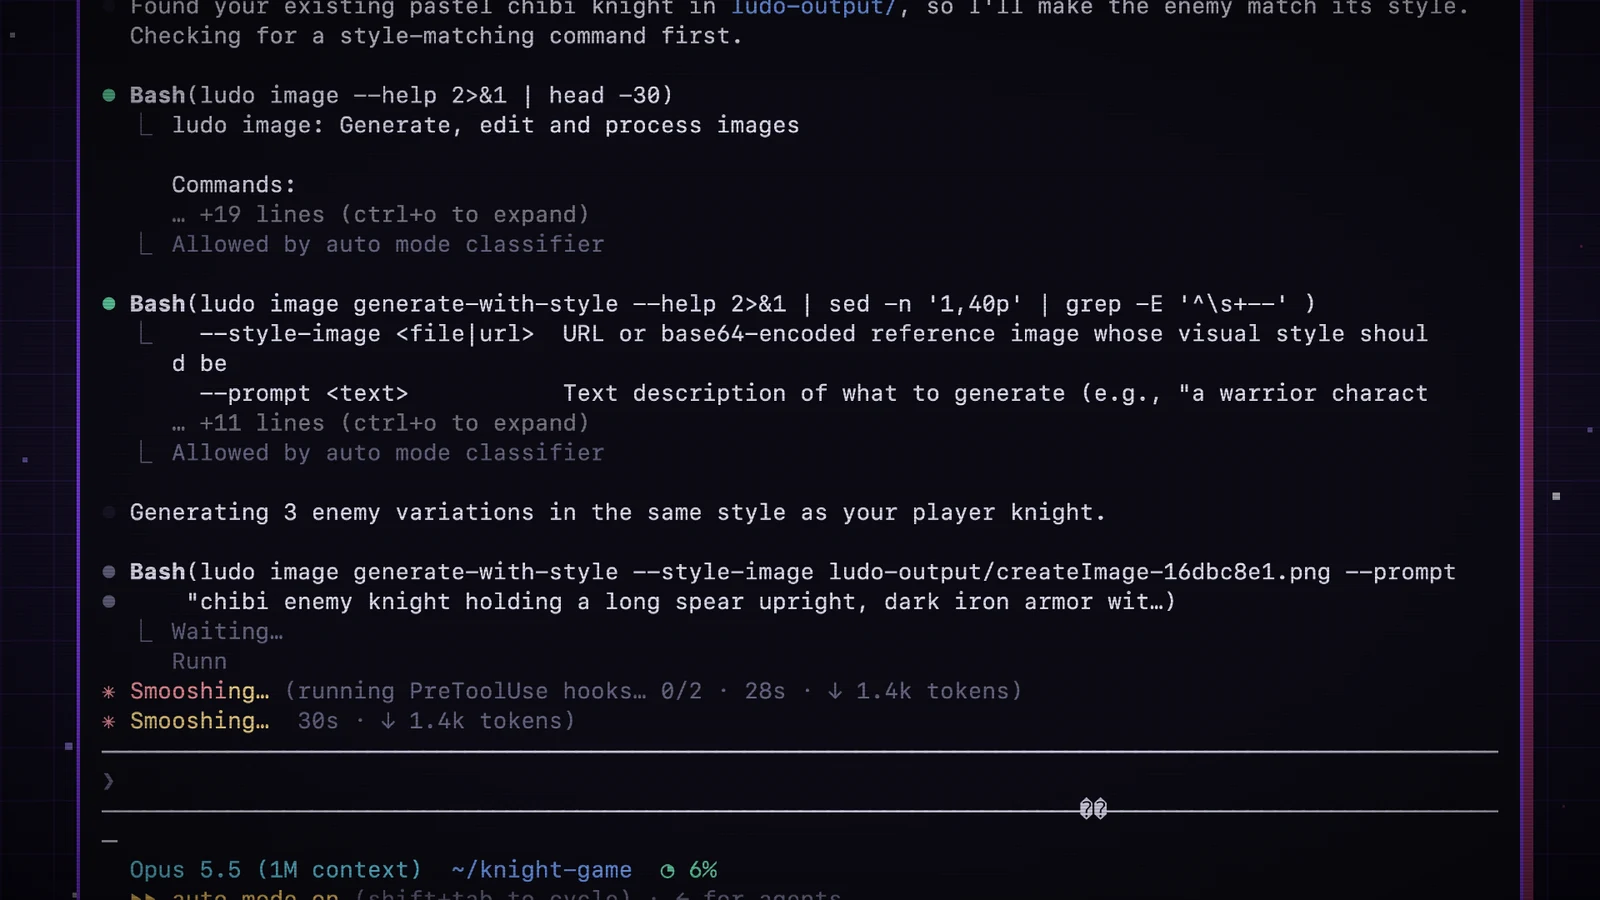
Install the Ludo skill and your agent knows the CLI, so you can ask for assets in plain words while it builds your game:
Claude Code
ludo skill installAdd --project to share it through the repository. It is also a plugin: /plugin marketplace add Ludo-AI/ludo-cli, then /plugin install ludo@ludo.
Codex, Cursor, GitHub Copilot and other agents that read skills
npx skills add Ludo-AI/ludo-cliInstalls the same skill for the agents it finds in your project.
Gemini CLI
gemini extensions install https://github.com/Ludo-AI/ludo-cliInstalls Ludo as a Gemini CLI extension, with the skill inside.
ludo init also writes the instructions into a project for the agents it finds, and ludo agent-help prints a one-page guide for any other agent.
When an agent runs it, ludo prints plain JSON with the saved file paths and no previews or colour. The agent looks up only the commands it needs through --help, so it spends far fewer tokens than with MCP, which loads the schema of every Ludo tool before the first request. That is why the CLI is the recommended way to give agents access to Ludo. ludo feedback lets you, or your agent, tell us about a bug, a limitation or a feature you want.
Always current
Commands, flags and prices come from the live Ludo API, so new models and features show up without an update. When a new version of the CLI itself is out, it tells you, and ludo update installs it.
CLI or MCP?
For AI agents, use the CLI: it uses far fewer tokens, and files go in by path instead of base64. MCP is for chat assistants that can't run commands. Set up MCP
| Ludo CLI | MCP server | |
|---|---|---|
| Setup | npm install, then ludo login in the browser | Add the server and API key to each client |
| Files | Pass local paths; results saved to disk | URLs and base64; results expire after 7 days unless downloaded |
| Token use | Low: reads only the commands it uses, and local files go in by path | High: loads every tool schema (30+) up front, and a local file has to be written out as base64 inside the tool call |
| Works in | Any terminal, any agent that can run commands, scripts and CI | MCP-enabled clients |
| Best for | Coding agents (recommended), building a game in a repo, batch work, automation | Chat assistants that can't run commands |
Build with Ludo from your terminal
Install it, log in, and make your first sprite.