
Craft Winning Game Ideas with Ludo.ai's Project Tool
Create your game's blueprint with an AI-powered co-writer that helps you structure and generate ideas for mechanics, story, characters, and more, all in one flexible workspace.
Ludo's Project tool, shown on one real game design document, from a game idea to sections, Ask Ludo and generated art:
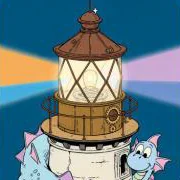
- Fill in the document: Create a project from an idea, a PDF, text or a real game, pick a template, and Ludo writes each section. Monster Light Keeper, created from its Game Ideator idea with the Essential template: the summary and concept art, then Gameplay sections written for this game, such as the mechanic Prismatic Beam Focusing (players rotate colored glass lenses onto the lighthouse lamp to attract specific monster diets) and Dockside Harmonic Choirs.
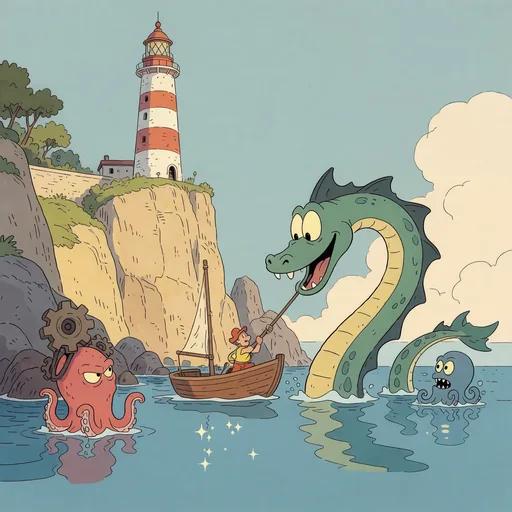
- Ask Ludo: Ask Ludo about any section: it knows the game and the section, rewrites text, and makes pictures for it. On the objective "Rekindling the Abyssal Beacon": "Rewrite the opening line so this has a clear risk" gave a new line with a risk in it, and "Create an illustrative image for this section" gave a picture of the lighthouse and the Leviathan, dragged into the section.
- Add art: Add images, video, 3D assets, sprites, audio or a game to any section, generated for it or uploaded. Add Image, then Generate, on the same objective: Image Suggestions made for it, and the first one added to the section next to the picture from Ask Ludo.

What is an AI Game Design Document (GDD) Tool?
Ludo.ai's Project tool is an AI-powered Game Design Document (GDD) editor that turns a raw concept into a structured, shareable game plan. You build the document section by section (mechanics, story, characters, art) with AI text suggestions, generate and embed images, sprites, 3D models, audio and video inline, ask Ludo for feedback, then export to PDF or generate engine-specific development guides.
Last updated November 2026
How it works
The Project tool is Ludo.ai's all-in-one workspace for planning a game and producing the assets to match.
- Start Your ProjectBegin from a blank document, import an existing idea from text, a PDF, or a real game, or develop a fresh concept straight from the Game Ideator.
- Build with AIAdd sections and use AI suggestions to draft text, then generate and embed images, sprites, 3D models, audio, and video inline. Ask Ludo for contextual feedback on any section.
- Finalize and ExportRefine the document, export it as a polished PDF, or generate a step-by-step engine guide for Unity, Godot, Unreal, and more to start building.
FAQ
The Project tool is an AI-powered Game Design Document (GDD) editor. Instead of a static text file, it is a structured workspace where you flesh out your game's mechanics, story, characters, and art section by section, with AI suggestions and generated assets built right into the document.
Yes. You can generate and embed images, sprites, 3D models, audio, and video directly within your document. Each section has its own "Suggestions" controls, so concept art, gameplay mockups, and assets live alongside the design text instead of in a separate tool.
They go to the Unused Assets vault at the end of the project. Assets kept there stay out of the exported PDF, and you can select one or several and move them into a section when you want them included.
Yes. You can import a concept from a PDF, from plain text, or by searching for a real game in Ludo's database. Ludo turns your input into a structured GDD you can edit and expand. You can also start a project from a concept in the Game Ideator, or let the Idea Pathfinder guide you step by step if you have no idea yet.
Open Share to export the full document as a PDF (with your text, images and embedded assets), copy it as text, or share it with your team. Version History lets you go back to an earlier state of the document.
Yes. The Tutorial tab generates a step-by-step development guide for your concept, with explanations and code snippets, for Unity, Godot, Unreal, Roblox, Cocos2d-x, Buildbox, and Solar2D. Pick a Beginner or Advanced track, add an optional prompt, and keep several guides per project.
"Ask Ludo" is a contextual AI assistant built into the document. It understands the section, element, and game you are working on, so you can request feedback, brainstorm alternatives, or refine ideas without leaving your project. Your chat history is preserved as you work.
Yes. Share a project with your team, and edits, new sections, reordering, and generated assets sync live, so several people can work on the same game design document together.
You own the assets you generate with Ludo and can use them however you like, including in commercial games.
The Project workspace itself is used inside the Ludo.ai app and is not exposed as a standalone API or MCP endpoint. The generators it uses (images, sprites, 3D models, audio, and video) are available through Ludo's API, MCP and CLI for developers building custom asset workflows.
Project documentation
The Project tool in Ludo.ai offers multiple ways to begin crafting your game idea. Here are the most common approaches:
-
Starting from a Generated Idea:
- Use the Game Ideator or the Idea Pathfinder to generate game concepts.
- When you find an idea you like, click the "Create Project" button on the idea card.
- This automatically creates a new Project pre-filled with the generated idea's title, description, art style, perspective, platform, and a starting set of content sections.
-
Importing a Project from the Homepage:
- On the Ludo.ai homepage, click the Import Project tile in the showcase gallery to open the import dialog.
- Choose one of three import sources using the tabs at the top:
- PDF — drag and drop (or browse to) a PDF of an existing game design document. Ludo will extract the content into a new Project.
- Text — set the Platform, Art Style, Perspective, and Genres, enter a title and description (up to 1,000 words), and optionally drag and drop reference images. Click Import Project to create the document.
- Game Search — search for an existing game by title and select it. Ludo will create a Project seeded from that game's information.
-
Starting from Scratch:
- Click the purple plus sign (+) in the top menu bar to start a new blank Project.
- Give your project a title and write a brief description.
- Use the options at the top to specify your game's style, perspective, genre, and platform. These choices help tailor AI suggestions and refine your project's focus.
- Add an icon and header image by clicking the placeholders at the top.
Once your Project is created, you can begin building it out:
- Hover your mouse in the space between sections to reveal the floating Add Content bar. Use the plus (+) button or click on a suggested section type (like Mechanics, Objectives, etc.) to add new content to your document.
Your Project is a living document. You can always return to it later to make changes or additions as your idea evolves.
-
When you choose to create a Project from a Ludo-generated idea, your new document begins a dynamic creation process. You will see a loading bar at the bottom of the screen as Ludo populates the document with several key elements:
- Title and Description: The game's title and a brief description are automatically filled in.
- Visual Elements: An icon and a header image that capture the essence of the game idea are included.
- Game Parameters: Key details like Platform, Art Style, Perspective, and Genres are pre-selected based on the generated idea.
- Core Sections: Depending on the idea, initial sections such as Gameplay, Game World, and Art & Mockups are created and filled with AI-generated text and images.
This pre-populated content serves as a starting point. From here, you can use Ludo's AI-assisted tools to edit, expand, and refine your project further.
Expanding your Project is done using the new block-based editor. The primary way to add new content is with the floating Add Content bar.
- Hover your mouse in the space between any two sections in your document. A floating bar with a plus (+) button and several common section types (e.g., Mechanics, Objectives, Rules) will appear.
- Click the plus (+) button to open the Add New Content modal. Here you can browse all available content types, categorized for convenience (AI Suggestions, Mechanics, Game World, Art & Production, etc.).
- Alternatively, click directly on one of the suggested section types on the floating bar (e.g., "Mechanics") to instantly add a new block of that type.
- You can add different kinds of content blocks:
- Content Sections: For detailed descriptions like Mechanics, Storyline, or Playable Characters. These can be generated by AI or written manually.
- Section Headers: Use these to organize your GDD into larger, collapsible parts (e.g., a header for "Character Design" followed by multiple Playable Character sections).
This modular approach allows you to structure your document logically and build it piece by piece.
When you add a new content block (like "Enemies" or "Mechanics"), you are presented with three initial options for how to populate it:
-
Generate New: This is the primary way to use Ludo's AI. Clicking it opens one of two interfaces:
- Suggestion Input: A small text box appears. You can leave it blank for general AI suggestions based on your game's context, or you can type a specific prompt (e.g., "a rival surfer who uses technology") to guide the AI.
- AI Suggestions Sidebar: For more complex content like characters or enemies, a sidebar will open on the right. Ludo will provide multiple, fully-formed options with both text and images. You can browse these suggestions and click "Add to Project" to insert your chosen one into the document.
-
Edit Manually: This option adds a blank, untitled section to your document. You can then add your own title, text, and media, giving you complete manual control.
-
Delete Content: If you decide you don't need the new block, simply click this to remove it.
This workflow provides flexibility, allowing you to choose between AI-driven creation and manual input for every piece of your GDD.
-
The "Ask Ludo" feature is your AI co-pilot, now more powerful and context-aware than ever.
-
Overall Project Assistance: Use the "Ask Ludo" button in the main header at the top of your document to have a conversation about the entire project. This is great for high-level feedback, brainstorming, or market analysis.
-
Context-Specific Assistance: Every section and content block in your GDD now has its own Ask Ludo button (a small chat bubble icon).
- Clicking this button opens the Ludo AI Chat Assistant with the conversation already focused on that specific block of content.
- For example, if you click "Ask Ludo" on your main character's section, the AI will know you're talking about that character and provide targeted suggestions.
- When you switch context by clicking "Ask Ludo" on a different section, a "CONTEXT SWITCHED" message will appear in the chat, indicating the AI's focus has shifted.
This allows you to have highly focused, productive conversations about individual elements of your game without losing the broader context.
-
Visuals are now integrated directly into your content sections, offering greater flexibility than a separate gallery.
-
Adding Media to a Section:
- Within any content block (like a character, mechanic, or custom section), you can add media. AI-generated sections often come with images automatically.
- To add more, hover over the media area and click the Add Media button (a square with a plus sign).
- A menu will appear allowing you to add an Image, Video, 3D Asset, Sprite, or Game.
-
Generating Media:
- For each media type, you can choose to Generate. This will open the AI Suggestions sidebar, where you can enter a prompt (e.g., "a futuristic surfboard") to generate new visuals.
- Ludo will provide several options. Click on one to add it directly to your section.
-
Managing Multiple Media Items:
- You can add multiple media items to a single section to create a gallery-like feel.
- Reorder media within a section by simply clicking and dragging it to a new position.
- Move media to a different section by dragging it and dropping it into the designated "Drop media here" area of another section.
- Hover over any media item to access options to zoom, edit, or delete.
-
The Project tool now automatically saves a history of your changes, allowing you to review and revert to previous versions of your document at any time.
-
Accessing Version History:
- Click the Version History icon (a clock with a counter-clockwise arrow) in the header bar at the top right of your screen.
- A modal window will open, displaying a timeline of all saved edits on the right side. Each entry shows what was changed (e.g., "Updated Enemies," "Added Section") and when.
-
Previewing and Restoring:
- Click on any version in the timeline on the right. A read-only preview of how the document looked at that point in time will load in the main part of the window.
- You can browse through different versions to track the evolution of your ideas.
- If you want to revert your document to an older state, select the desired version and click the purple "Restore to this version" button.
- A confirmation will appear, warning you that this action will undo all subsequent changes. Click "Proceed" to restore.
This feature is invaluable for tracking progress, recovering accidentally deleted content, or exploring different creative directions without fear of losing your work.
-
Game development is an iterative process, and your project should evolve over time:
- Return to your saved document whenever you have new ideas or insights.
- Regularly use the contextual "Ask Ludo" feature within specific content blocks for targeted suggestions.
- Review each section critically, ensuring it's clear, focused, and aligned with your overall vision.
- Use the Version History feature to look back at previous ideas or revert changes if a new direction isn't working out.
- Consider exporting your project to PDF and sharing it with trusted peers for external feedback.
- Don't be afraid to remove or dramatically alter content blocks using the options menu (...) on each block.
Remember, refining your project is about enhancing your core idea, not completely changing it with every iteration.
The Tutorial tab, located within your Project interface next to the Edit tab, provides access to an AI-powered feature that generates a personalized, step-by-step development guide based directly on the contents of your Project.
Accessing and Generating the Guide:
- Navigate: Click the Tutorial tab within your opened Project.
- Customize (First Generation): Before generating the initial guide, configure the following options:
- Experience Level: Select either Beginner (providing more detailed explanations and foundational code examples) or Advanced (focusing on optimizations, complex patterns, and assuming prior knowledge). This adjusts the depth and complexity of the instructions.
- Select Game Engine: Choose from the supported engines: Unity, Unreal, Godot, Roblox, Cocos2d-x, Buildbox, or Solar2D. This selection determines the specific APIs, code syntax, and workflow steps presented in the tutorial.
- Customize Your Guide (Optional): Enter text to guide the AI on specific areas to focus on (e.g., "focus on the inventory system and AI behavior") or leave blank for a comprehensive tutorial covering all aspects derived from your Project's Edit tab.
- Generate: Click the Generate New Development Guide button. The AI analyzes your Project's content (mechanics, features, assets described in the Edit tab) and generates the structured guide based on your selected settings.
Understanding the Generated Guide:
- Structure: The tutorial is organized hierarchically into major development Sections (e.g., "Project Setup", "Core Gameplay Mechanics", "UI Implementation"), which contain relevant Topics (e.g., "Player Movement", "Enemy Spawning"), further broken down into specific Steps (e.g., "Create Player Input Script", "Implement Collision Detection").
- Step Content: Each step provides:
- A description of the task and its purpose within the game.
- Detailed, sequential instructions for implementation within the chosen game engine.
- Illustrative code snippets or pseudo-code relevant to the engine and task. Note: These are starting points and may require adaptation.
- Potential considerations regarding performance, design, or integration with other systems mentioned in your Project.
- Navigation: Use the Back to Topics link to return to the topic overview or the Next: [Step Name] → button to proceed sequentially through the steps within a topic.
Interactive Assistance:
- Integrated Ask Ludo: Each detailed step page includes an Ask Ludo chat interface at the bottom. This AI assistant is context-aware, understanding the specific step you are viewing and your overall Project. Use it to ask for clarifications, alternative approaches, explanations of code, or troubleshooting advice related to that step.
Regenerating the Guide:
- If a guide already exists, the Start New Guide button appears at the top right. Clicking this allows you to re-configure the options (Experience Level, Engine, Focus) and generate a completely new guide.
- The current guide is automatically saved and easily accessible from the Tutorial tab, so you can generate as many tutorials as you need, focusing on different subjects.
- It is recommended to regenerate the guide after making significant updates to your Project in the Edit tab to ensure the tutorial reflects the latest design.
This feature aims to provide a structured, actionable roadmap derived from your specific game design, helping to accelerate the transition from project to development by offering engine-specific, personalized implementation guidance.
Once you're satisfied with your project, you may want to share it:
- Click the "Share" button at the top right of your document.
- Choose to export as a PDF file. This creates a professionally formatted document of your entire project.
- Use your exported project to:
- Distribute to team members or stakeholders
- Import into other game development tools
- Present your idea to potential publishers or investors
Remember, your project is a living blueprint. Even after exporting, continue to refine and update it as your game development progresses.
<br>Here are some common problems and their solutions for the Project interface:
- Problem: AI suggestions aren't what I want.
- Solution: Be more specific. When using the Generate New option, provide a detailed prompt in the input box or the suggestions sidebar. Instead of "enemy," try "a rogue AI drone that shoots ice shards."
- Problem: I can't find the "Add Section" button.
- Solution: The button is part of a floating bar. Simply hover your mouse in the space between any two content blocks, and the bar with the plus (+) button will appear.
- Problem: I want to add more images/videos to one section.
- Solution: Hover over the existing media in a section and click the Add Media button (a square with a plus sign) that appears. You can add as many media items as you need to a single block.
- Problem: I want to revert a change I made.
- Solution: Use the Version History feature by clicking the clock icon in the top-right header. You can preview and restore any previous version of your document.
- Problem: I uploaded or generated media for this Project but it doesn't appear in any section.
- Solution: Check the Asset Vault at the bottom of your Project. Assets you create in other tools (Image Generator, Sprite Generator, 3D Asset Generator, etc.) and save to the Project land here, along with any media you upload directly to the Project without placing it in a section. Drag items out of the vault and drop them into the section where you want them to live.
- Problem: Ask Ludo or the AI suggestions don't seem to "see" assets I added to the Project.
- Solution: The AI deliberately ignores everything inside the Asset Vault. If you want a character render, mockup, or reference image to inform Ludo's suggestions for a section, move it out of the vault and into the relevant content section. Once it lives inside a section, the AI will use it as context.
If you encounter persistent issues not covered here, don't hesitate to contact Ludo.ai's support team for assistance, or join our Discord server: https://discord.gg/FmTPyugsrR
- Problem: AI suggestions aren't what I want.
Every Project includes an Asset Vault — a permanent container that holds any media you've uploaded or generated for the project but haven't placed into a specific content section.
Where to find it:
- The Asset Vault appears as its own collapsible section in your Project, marked with a 🔒 icon and the label "Asset Vault."
- On a newly created Project with no other sections yet, the vault is forced open so you don't miss it. Once your Project has other sections, you can collapse or expand the vault using the chevron on the left of its header — your choice is remembered between visits.
What it's for:
- Collecting assets generated elsewhere. When you create something in another tool — an image in the Image Generator, a sprite in the Sprite Generator, a 3D model in the 3D Asset Generator, an audio clip, a video, etc. — and save it to the Project, it lands here. The Asset Vault is the default destination for any asset attached to the Project that hasn't been placed into a specific content section.
- Holding loose media. Media you upload directly to the Project (rather than to a particular section) is also collected here under "Unused Assets."
- Staging assets before placing them. Drag any item out of the vault and drop it into the "Drop media here" area of a content section to attach it where it belongs.
Important behavior:
- Excluded from PDF export. Anything left in the Asset Vault will not appear when you export your Project to PDF.
- Ignored by the AI. Ludo's AI does not read the Asset Vault as part of your design context. To make sure an asset informs AI suggestions or appears in your shared Project, move it into a relevant content section.
Think of the Asset Vault as a holding area: it keeps useful references close at hand without cluttering your design, but assets only become "part of" your Project once you place them into a section.